
mycelyso Readme


Frontmatter
Screenshot
Installation and Analysis Tutorial Videos

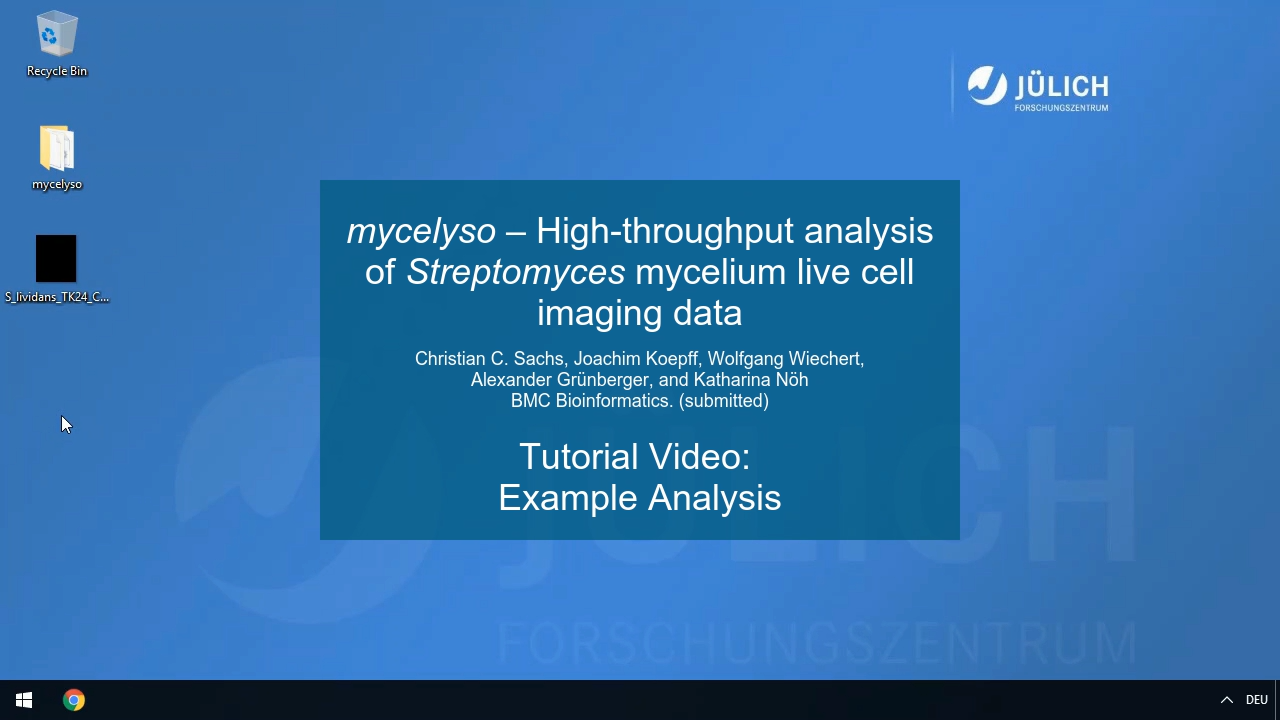
These videos shows how to download and unpack mycelyso as well as to run a test analysis using the pre-packages Windows version of mycelyso.
Publication
When using mycelyso for scientific applications, please cite our publication:
Sachs CC, Koepff J, Wiechert W, Grünberger A, Nöh K (2019) mycelyso – high-throughput analysis of Streptomyces mycelium live cell imaging data BMC Bioinformatics, volume 20, 452, doi: 10.1186/s12859-019-3004-1
It is available on the BMC Bioinformatics homepage at DOI: 10.1186/s12859-019-3004-1
Documentation
Documentation can be built using sphinx, but is available online as well at Read the Docs.
Getting mycelyso and Datasets
Example Datasets
You can find an example dataset deposited at zenodo DOI: 10.5281/zenodo.376281.
Ways to install mycelyso
Pre-Bundled Windows Application
If you don’t have a Python 3 installation ready, and want to just run mycelyso, we you can download a pre-packaged version for 64-bit versions of Windows (mycelyso-win64.zip) from AppVeyor.
Please note, that, instead of python -m mycelyso or python -m mycelyso_inspector, the calls would then be mycelyso.exe or mycelyso_inspector.exe.
Packages for the conda Package manager
While mycelyso is a pure Python package, it has some dependencies which are a bit more complex to build and might not be present in the PyPI (Python Package Index). Thankfully the conda Package manager / Anaconda environment provides all packages necessary in an easy to use manner. To use it, please download Anaconda (Miniconda could be downloaded as well, but as most packages included in Anaconda are needed anyways, it does hardly provide a size benefit).
You have to enable the necessary channels (we aim to add mycelyso to bioconda lateron):
> conda config --add channels conda-forge
> conda config --add channels bioconda
> conda config --add channels csachs

> conda install -y mycelyso mycelyso-inspector
Please note that this readme assumes you are starting with a fresh install of Anaconda/Miniconda. If you start with an existing installation, individual dependency packages might need to be updated.
Packages from PyPI (for advanced users)
If you have a working Python 3 installation and can eventually fix missing dependencies, you can as well use the PyPI version:
> pip install --user mycelyso mycelyso-inspector
Directly from github (for advanced users)
> pip install --user https://github.com/modsim/mycelyso/archive/master.zip mycelyso-inspector
mycelyso Quickstart
mycelyso is packaged as a Python module, to run it, use the following syntax:
> python -m mycelyso
Which will produce the help screen:
mycelyso INFO
  MYCElium   anaLYsis __ SOftware
  ___   __ _________ / /_ _____ ___         Developed  2015 - 2019 by
 /  ' \/ // / __/ -_) / // (_-</ _ \ __
/_/_/_/\_, /\__/\__/_/\_, /___/\___/'  \.   Christian   C.  Sachs  at
      /___/          /___/              |
            \    `           __     ,''''   Modeling&Simulation Group
             \    `----._ _,'  `'  _/
              ---'       ''      `-'        Research  Centre  Juelich

               For more information visit: github.com/modsim/mycelyso

If you use this software in a publication, please cite our paper:

Sachs CC, Koepff J, Wiechert W, Grünberger A, Nöh K (2019)
mycelyso – high-throughput analysis of Streptomyces mycelium live cell imaging data
BMC Bioinformatics, volume 20, 452, doi: 10.1186/s12859-019-3004-1

usage: __main__.py [-h] [-m MODULES] [-n PROCESSES] [--prompt]
                   [-tp TIMEPOINTS] [-mp POSITIONS] [-t TUNABLE]
                   [--tunables-show] [--tunables-load TUNABLES_LOAD]
                   [--tunables-save TUNABLES_SAVE] [--meta META]
                   [--interactive] [--output OUTPUT]
                   input

positional arguments:
  input                 input file

optional arguments:
  -h, --help            show this help message and exit
  -m MODULES, --module MODULES
  -n PROCESSES, --processes PROCESSES
  --prompt, --prompt
  -tp TIMEPOINTS, --timepoints TIMEPOINTS
  -mp POSITIONS, --positions POSITIONS
  -t TUNABLE, --tunable TUNABLE
  --tunables-show
  --tunables-load TUNABLES_LOAD
  --tunables-save TUNABLES_SAVE
  --meta META, --meta META
  --interactive, --interactive
  --output OUTPUT, --output OUTPUT
To run an analysis, just pass the appropriate filename as a parameter. The desired timepoints can be selected via the
--timepoints switch, and if the file contains multiple positions, they can be selected with --positions.
Supported file formats are TIFF, OME-TIFF, Nikon ND2 and Zeiss CZI.
The analysis will use all cores present by default. While this is generally desirable, it might lead to consuming
too much memory (as each parallel acting process needs a certain additionally amount of memory).
If you notice that mycelyso takes up too much memory, try limiting the number of processes via -n.
If you choose -n 0, the code will additionally not use the parallel subsystem (multiprocessing).
Running an analysis
To analyze the example dataset, run:
(-t BoxDetection=1 is used, as the spores were grown in rectangular growth chambers, which are to be detected.
Otherwise, the software will use the whole image, or cropping values as set via -t CropWidth=.../-t CropHeight=....
If the data is pre-segmented (i.e. input is a binary image stack), choose -t SkipBinarization=1.
> python -m mycelyso S_lividans_TK24_Complex_Medium_nd046_138.ome.tiff -t BoxDetection=1
Optionally, you can inspect the segmentation and produced graph on a per-frame basis before running a complete analysis, by
adding the --interactive flag, in which case mycelyso will start an interactive viewer.
mycelyso stores all data compressed in HDF5 files, by default it will write a file called output.h5 (can be changed with --output).
> ls -lh --time-style=+
total 1.3G
-rw-rw-r-- 1 sachs sachs 5.4M  output.h5
-rw-rw-r-- 1 sachs sachs 1.5G  S_lividans_TK24_Complex_Medium_nd046_138.ome.tiff
Multiple datasets/positions can be stored in the same file, it will only make problems if the same position is about to be analyzed twice. Binary masks/skeletons are stored in the HDF5 file, as well as GraphML representations of the tracking graphs. The HDF5 file can be investigated with standard HDF5 tools, tabular data is to be opened with pandas, as it is stored with its format.
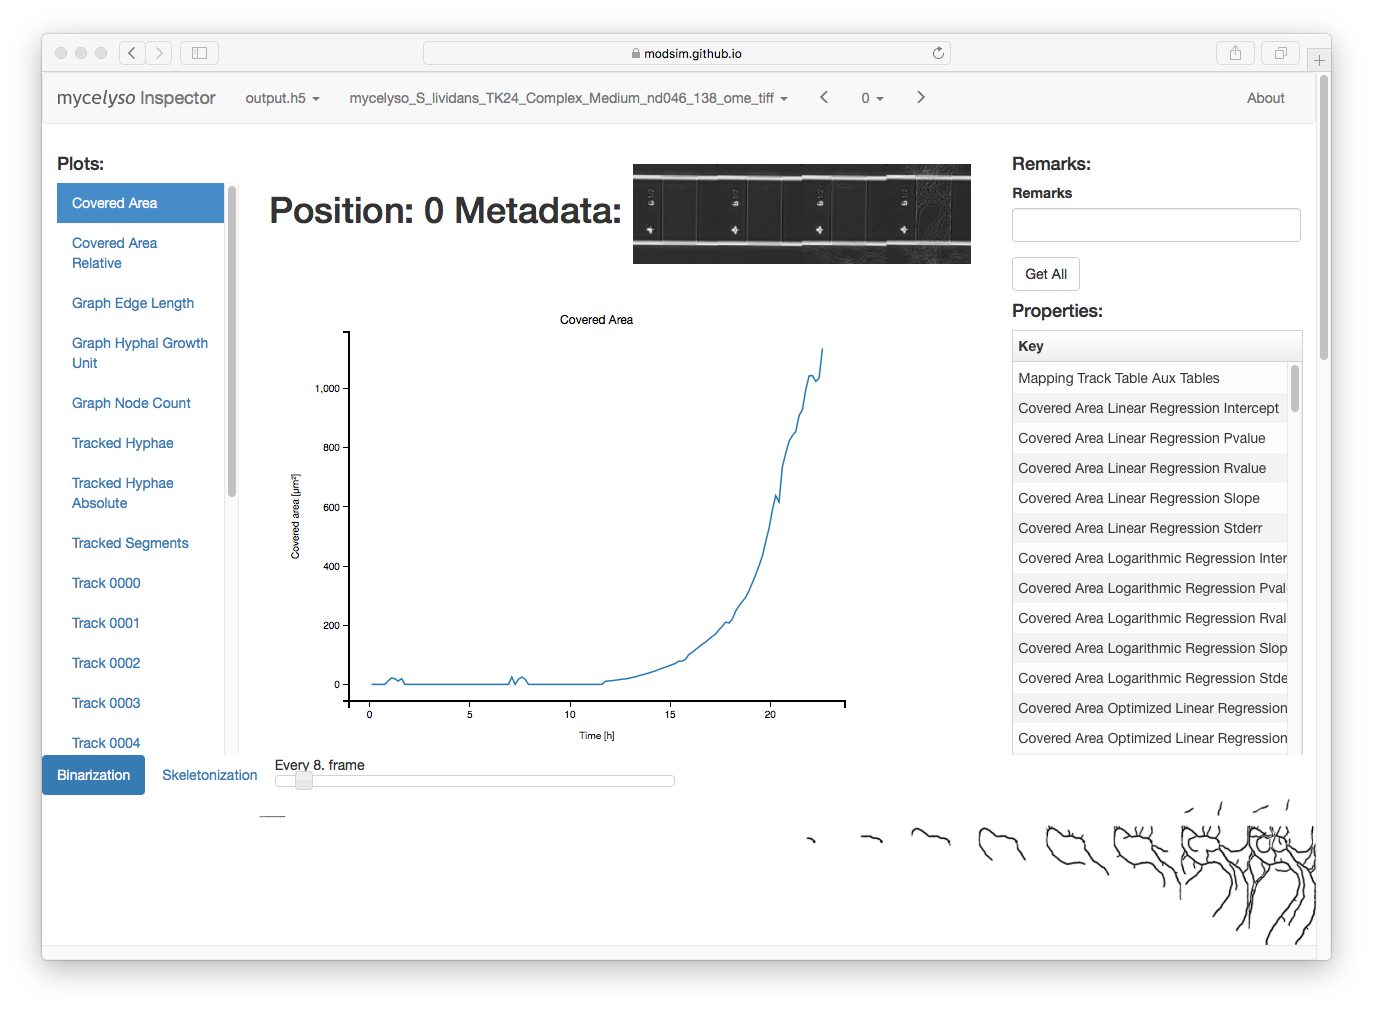
Results visualization using mycelyso Inspector
However, since the raw data is only interesting if you want to perform custom analyses, it is much more straightforward to use the integrated visualization tool mycelyso Inspector as a helper to take a look at the results:
> python -m mycelyso_inspector
mycelyso Inspector will output the URL it is serving content at, and by default automatically open a browser window with it.
In mycelyso Inspector, you have various information displays: On the top, the HDF5 file / analyzed dataset / position can be selected. On the left, there is a list of graphs available. In the middle, there is the currently selected graph displayed. On the right, there is general information about the whole position (colony level statistics), below the main part is a table with information about individual tracks, and scrolled further down is the possibility to show individual graph tracking in 2D or a colony growth oversight in 3D. Sticky at the bottom is binarized or skeletonized timeline of the position.
The data to all graphs can be downloaded as tab separated text by pressing the right mouse button on a certain graph link (in the left menu) and choosing ‘Save As’.
Information: Occasional warnings in the console about invalid values are due to missing/invalid data points, and are of no particular concern.
WARNING: mycelyso Inspector will serve results from all HDF5 (.h5) files found in the current directory via an embedded webserver.
Furthermore as a research tool, no special focus was laid on security, as such, you are assumed to prevent unauthorized
access to the tool if you choose to use an address accessible by third parties.
Setting calibration data for TIFF files
TIFF files provide no standard way to set temporal information per frame. To set these parameters manually, e.g. a pixel size of 0.09 µm/pixel and an acquisition interval of 600 s (10 min) use:
> python -m mycelyso "the_file.tif?calibration=0.09;interval=600"
Tunable Parameters
The analysis’ internal workings are dependent upon some tunable parameters.
All tunables are listed in the tunables documentation subpage. To check their current value, you can
view them all using the --tunables-show command line option, which will as well print documentation.
To set individual ones to a different values one can use -t SomeTunable=NewValue.
Individual tunables are documented within the API documentation as well.
> python -m mycelyso --tunables-show
> python -m mycelyso -t SomeTunable=42
Docker
Docker a tool allowing for software to be run in pre-defined, encapsulated environments called containers. To run mycelyso via Docker, an image is used which is a self-contained Linux system with mycelyso installed, which can either be preloaded or will be downloaded on the fly.
Use the following commands to run mycelyso via Docker:
To analyze:
> docker run --tty --interactive --rm --volume `pwd`:/data --user `id -u` modsim/mycelyso <parameters ...>
To run mycelyso Inspector:
> docker run --tty --interactive --rm --volume `pwd`:/data --user `id -u` --publish 8888:8888 --entrypoint python modsim/mycelyso -m mycelyso_inspector <parameters ...>
To run interactive mode (display on local X11, under Linux):
> docker run --tty --interactive --rm --volume `pwd`:/data --user `id -u` --env DISPLAY=$DISPLAY --volume /tmp/.X11-unix:/tmp/.X11-unix modsim/mycelyso --interactive <parameters ...>
General remarks: --tty is used to allocate a tty, necessary for interactive usage, like --interactive which connects to stdin/stdout.
The --rm switch tells docker to remove the container (not image) again after use.
As aforementioned, docker is containerized, i.e. unless explicitly stated, no communication with the outside is possible.
Therefore via --volume the current working directory is mapped into the container.
Third Party Licenses
Note that this software contains the following portions from other authors, under the following licenses (all BSD-flavoured):
- mycelyso/pilyso/imagestack/readers/external/czifile.py:
- czifile.py by Christoph Gohlke, licensed BSD (see file head).
- Copyright (c) 2013-2015, Christoph Gohlke, 2013-2015, The Regents of the University of California